
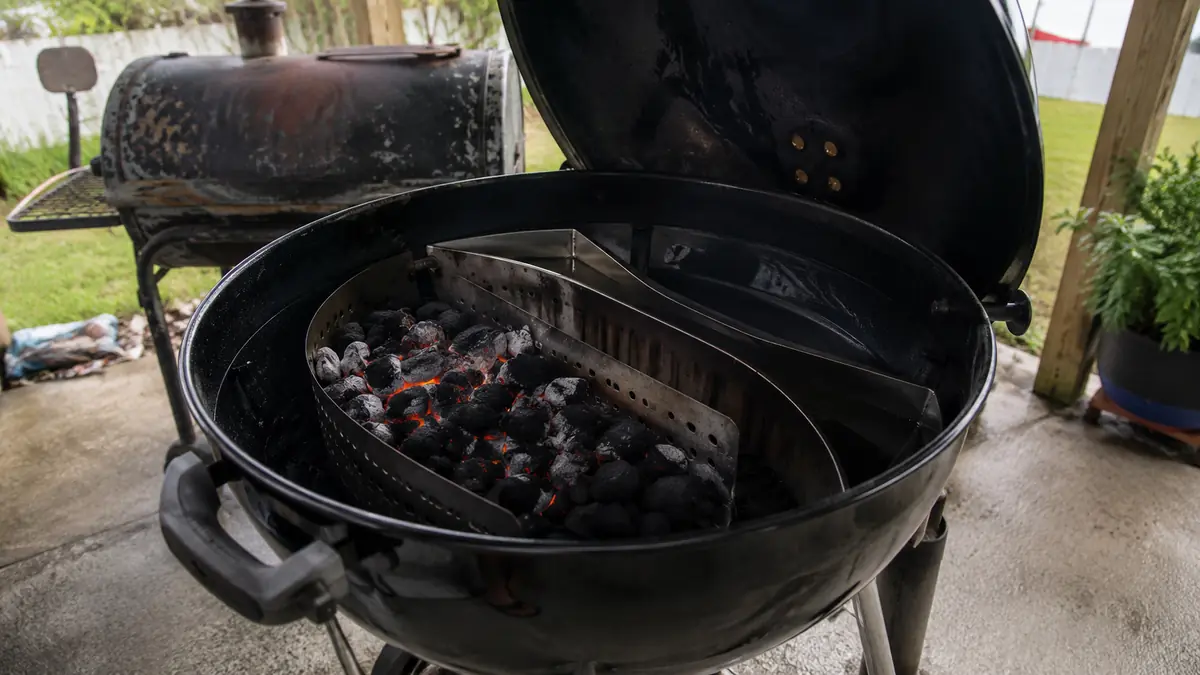
Every time I show someone how I set up my kettle for an overnight brisket, I get the same question: how do you actually load the thing. Not the marketing version, the real version, with the water reservoir and the vents and what to do when the wind off the bay decides to test you at two in the morning. So here's exactly how I set up a two-zone fire with the Slow 'N Sear on my 22-inch kettle, the same steps I use every single Sunday, written out the way I wish someone had written it out for me three years ago.
This isn't a theory piece. I've run this basket through roughly 150 low and slow cooks on a patio a few blocks off Ocean Drive in Corpus Christi, where the wind doesn't take days off and the salt air punishes anything you leave uncovered. If you can hold a steady fire here, you can hold one almost anywhere. Grab your charcoal, your chimney starter, and your Slow 'N Sear, and let's get the basket loaded.
Before You Fight Another Windy Fire, See What Actually Fixes It
Everything below assumes you're running the Slow 'N Sear charcoal basket insert on a 22-inch kettle. If you haven't picked one up yet, check today's price and current availability on Amazon before you start.
Amazon Check Today's Price on Amazon →Step 1: Load the Basket Before You Light Anything
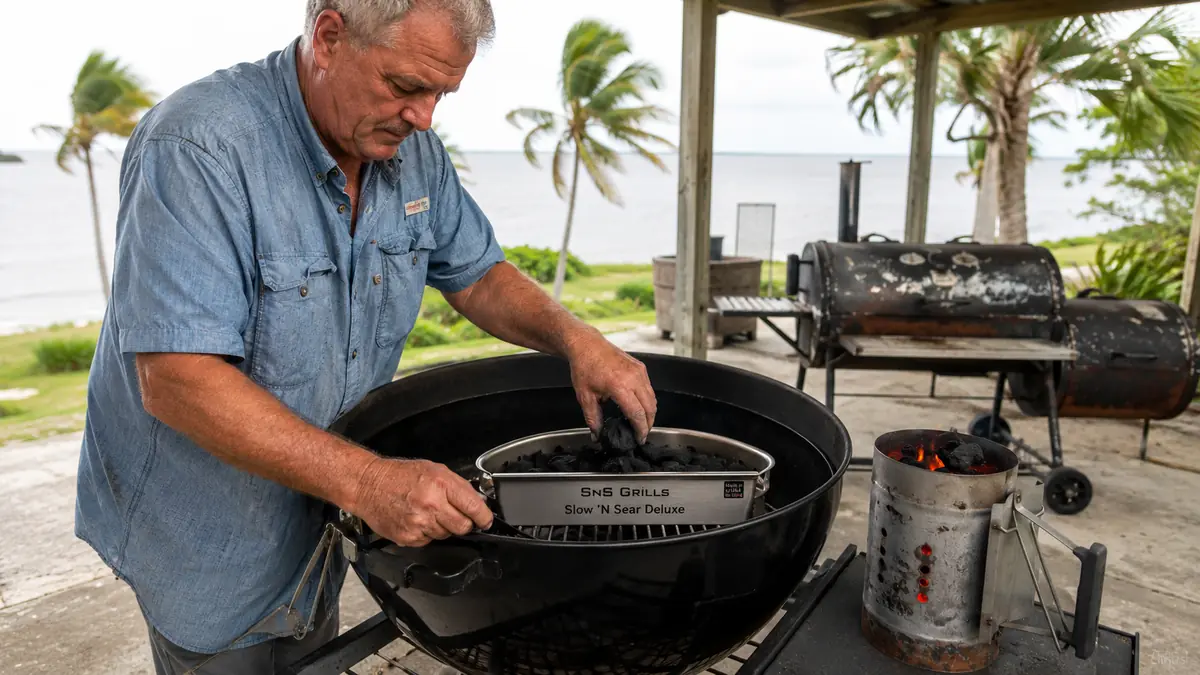
Start with the kettle empty and the Slow 'N Sear's two curved stainless panels clipped together into that semicircle shape against one side of the grill. Fill the basket with unlit briquettes or lump, packed snug but not crammed, right up near the top edge. I use about three quarters of a chimney's worth of unlit charcoal for a long overnight cook, less for a shorter afternoon session.
Resist the urge to skip straight to lighting. A loosely packed basket burns unevenly and leaves gaps that let heat sneak past the water reservoir toward your cool zone, which defeats the whole point of a two-zone setup. Press the charcoal down gently with your hand or the back of a scoop so it settles into the corners of the basket, and leave a small amount of headroom at the top so the fire has room to breathe once oxygen starts moving through it instead of choking itself on a mound of loose fuel.
Step 2: Fill the Water Reservoir
The reservoir sits directly behind the charcoal wall, and this step is the one people skip most often, usually because they're in a hurry to get coals lit. Fill it most of the way with warm tap water before you add a single lit coal. Warm water gets your kettle up to temperature faster than cold, and on a humid Gulf Coast morning that head start matters more than you'd think.
The water does two jobs at once. It acts as a heat buffer that smooths out temperature swings, and it catches drippings so you're not scraping a burnt crust off the kettle bowl the next morning. Top it off close to full. You'll lose some to evaporation over a long cook, and starting shy just means an earlier mid-cook refill.
Step 3: Light a Small Batch and Set It on Top
Fill a chimney starter about a third of the way with charcoal, light it, and let it burn until the top coals are grey and glowing, roughly fifteen minutes. Pour that lit charcoal directly on top of the unlit pile already sitting in the Slow 'N Sear basket. Don't scatter it across the whole basket. Concentrate it toward one end so the fire has a clear direction to burn into the unlit fuel, the same minion-method logic pitmasters have used for years, just contained inside a stainless wall instead of a loose mound on the kettle floor.
This is the piece that makes the two-zone setup actually work as advertised. The lit coals ignite the unlit charcoal in a slow, predictable line instead of all at once, similar in principle to a charcoal snake but contained inside solid stainless walls instead of a loose ring around the kettle floor. I cover exactly how that compares to the old snake method in my Slow 'N Sear versus charcoal snake breakdown, but for setup purposes, just know that a concentrated lighting point burns cleaner than scattering hot coals everywhere.
Step 4: Set Your Vents and Dampers
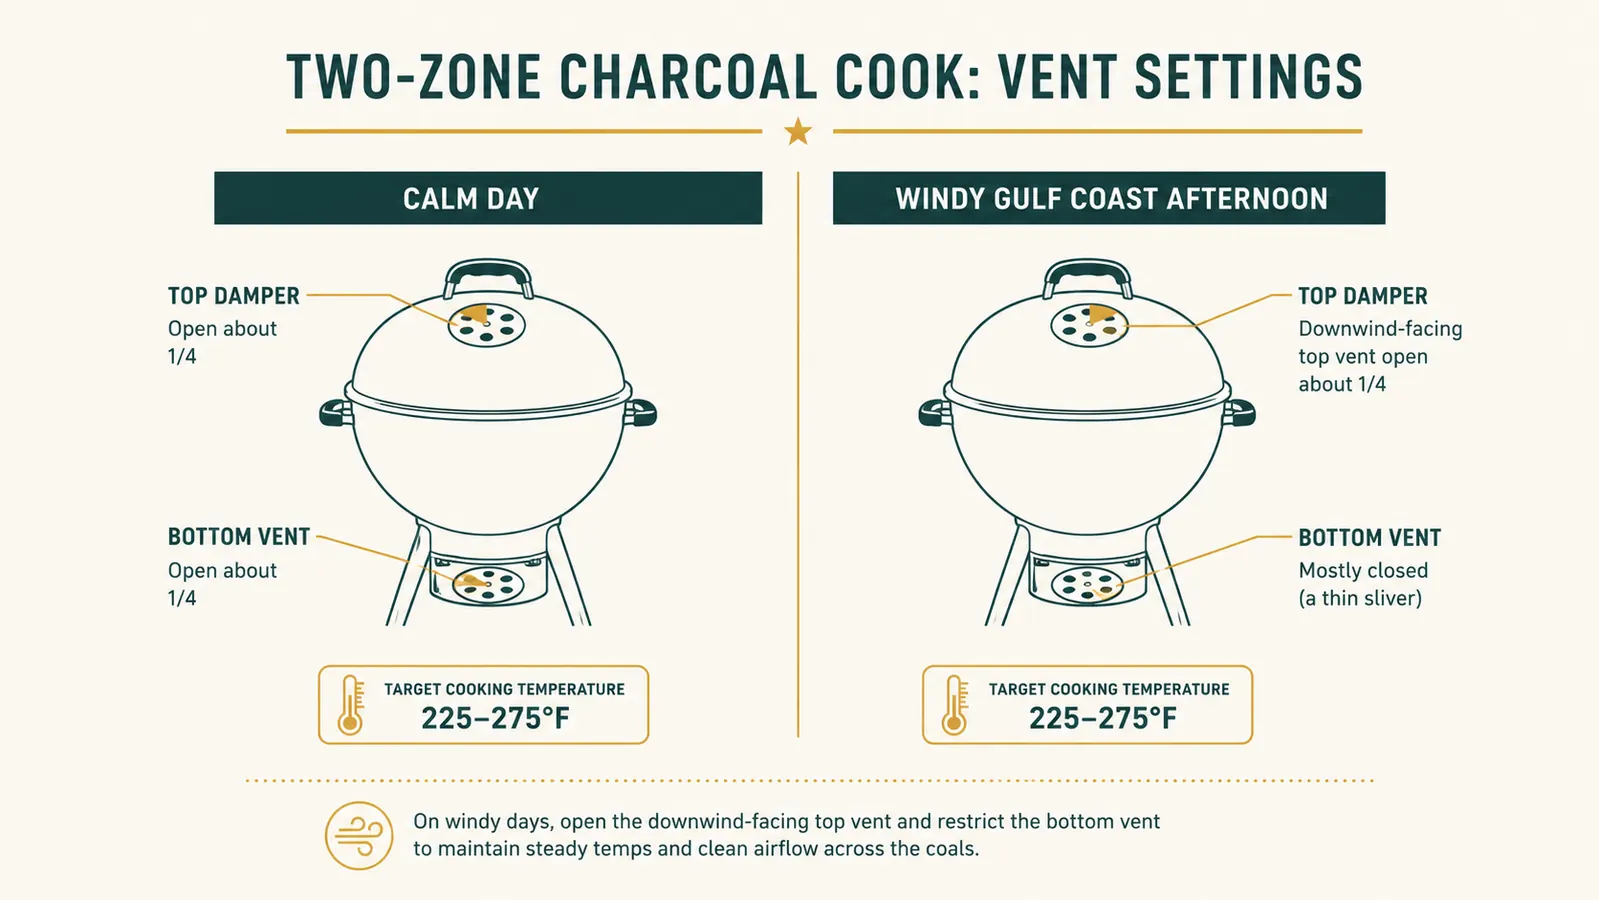
With the lid off, put the cooking grate on with the hinged access door, if your kettle has one, positioned over the basket so you can add charcoal or water later without lifting the whole grate. Close the lid, and open the bottom vent to about a quarter open and the top damper about halfway. Point the top vent away from the direction the fire is banked, so smoke and heat get pulled across your food and out the far side instead of straight up over the coals.
Give it fifteen to twenty minutes to settle before you trust the dome thermometer. A brand new fire climbs fast and then drifts down as it finds its rhythm, and adjusting vents too early usually means overcorrecting. Once it holds steady in the 225 to 250 degree range for ten minutes without you touching anything, you're ready to cook. That range works for brisket, pork butt, and most poultry; if you're doing a hot and fast cook instead, open both vents further and expect to manage a hotter, faster-moving fire that needs closer attention.
Step 5: Place the Food and Work the Two Zones
Your hot zone sits directly over the charcoal basket, your cool zone sits over the water reservoir and empty grate space on the far side. For a low and slow cook like brisket or pork butt, the meat goes in the cool zone, fat side toward the fire so it renders down and bastes the meat as it cooks. For a hard sear, like the burgers I throw on for Hollis's poker buddies who don't want pulled pork, that food goes straight over the basket in the hot zone.
The beauty of the stainless divider is that you can run both at once. I've smoked a pork butt low and slow on the cool side of the kettle while searing burgers directly over the basket on the hot side, something that never worked cleanly with a loose charcoal ring that had no real wall between the two zones. Steaks work the same way: sear them hard over the basket for a minute or two per side, then slide them into the cool zone to finish coming up to temperature without scorching the outside. If you want a longer list of what that flexibility actually opens up, I wrote a rundown of it in 10 reasons a charcoal basket insert changes how you smoke.
Step 6: Hold Your Temperature Through the Wind
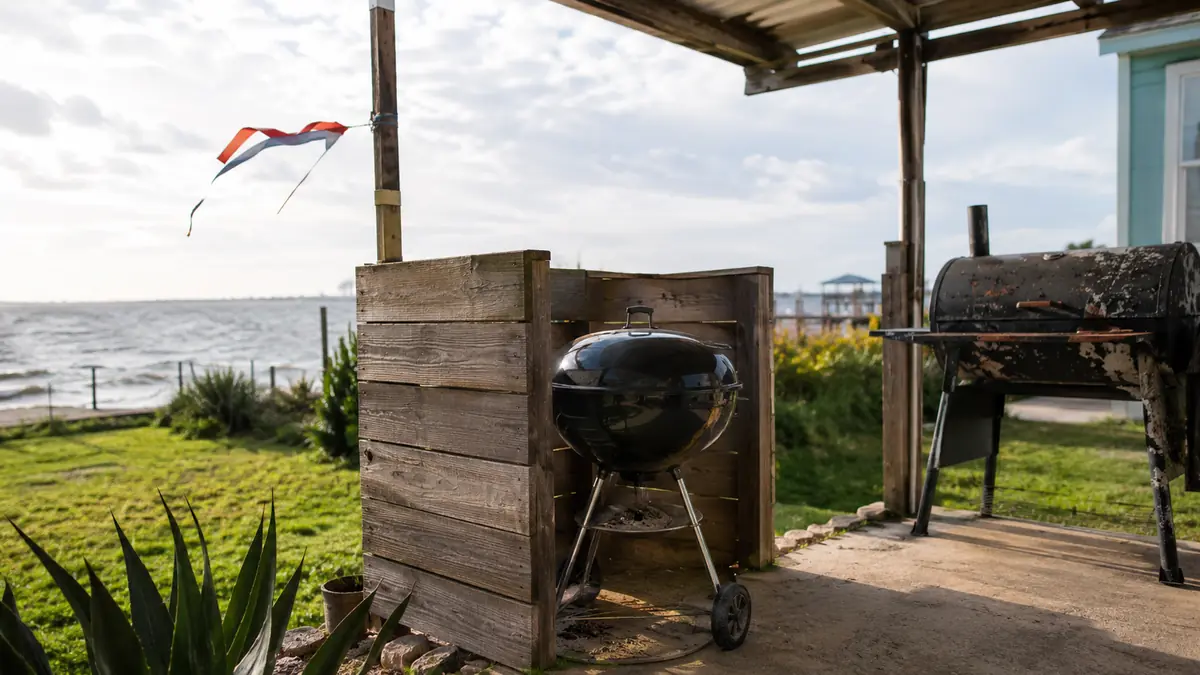
This is the part nobody teaches you, and it's the part that actually matters if you cook anywhere near open water. Corpus Christi wind picks up almost every afternoon and doesn't quit after sunset. A steady onshore breeze pushes extra oxygen through your bottom vent and can shove your temperature up thirty or forty degrees in twenty minutes if you're not watching it. My fix is simple: I position the kettle so the bottom vent faces away from the prevailing wind, not into it, and I built a low windbreak with scrap lumber along the side of the patio that catches the worst gusts before they hit the grill.
When a gust does get through, crack the bottom vent down a notch rather than slamming it shut. Slamming it chokes the fire too hard and you'll be fighting a stall twenty minutes later instead of a spike. On calm evenings I barely touch the vents more than twice in nine hours. On windy ones, and most of mine are windy, I'm making small quarter-turn adjustments every hour or so. That babysitting is real, but it's a minor annoyance compared to what a charcoal snake used to do to me in the same wind, which was fall apart entirely.
Mistakes That Ruin a Two-Zone Fire, and How to Recover Mid-Cook
The single biggest mistake is lighting too much charcoal at once. Dump a full chimney of lit coals on top of the basket instead of a partial one, and you'll spike past 300 degrees before you've even closed the lid, scorching whatever's on the grate and burning through your fuel supply hours early. If that happens, close the bottom vent almost all the way and crack the lid for thirty seconds to bleed off heat fast, then let the fire settle before dialing vents back open slowly.
The second mistake is letting the water reservoir run dry mid-cook without noticing. Once that water's gone, the reservoir stops buffering temperature swings and starts radiating heat back at your fire instead of absorbing it, which is usually when people see an unexplained climb around hour six or seven. Keep a kettle of warm water ready and top it off through the access door if your kettle has one, or lift the grate briefly if it doesn't. SnS Grills sells a fill tube accessory made exactly for this, and it's worth adding if you cook overnight often.
The third mistake, and the one that gets people in a hurry, is opening the lid too often to check on things. Every time that lid comes off, you lose heat and let wind straight into the fire, and on a gusty Gulf Coast evening that can undo twenty minutes of careful vent work in ten seconds. Trust the dome thermometer and a good instant-read probe instead of your eyes. If your temperature has genuinely stalled below 200 degrees for more than half an hour, add a handful of fresh lit coals through the access door rather than opening the whole lid to investigate.
The fourth mistake, and the sneakiest one, is chasing every small temperature wobble instead of watching the trend. A five degree dip when the sun ducks behind a cloud, or a five degree rise when it comes back out, isn't worth touching a vent over. React to a real, sustained drift over ten or fifteen minutes, not a single reading. Overcorrecting on every little swing is how a steady fire turns into a jumpy one, and it's the mistake I made most often in my first year with this basket before I learned to just let it ride.
What Else Helps
A few habits outside the basket itself make this whole process easier. I store my charcoal in a sealed plastic bin instead of the paper bag it comes in, because humidity out here clumps loose charcoal in a way that throws off how evenly the basket loads and lights. I also pull the Slow 'N Sear out of the kettle after every cook, rinse it, dry it, and store it in a tote instead of leaving it in the grill uncovered, after I found rust freckles on the reservoir screws from one wet October I left it exposed. On a stretch of coast where the forecast changes by the hour, I also check the evening wind speed before committing to an overnight cook, since a night with gusts over twenty knots means more vent babysitting no matter how good your setup is. If you want the full maintenance picture, including what three years of salt air actually does to the stainless, I laid it all out in my honest Slow 'N Sear review.
A two-zone fire isn't about never touching the vents. It's about knowing which touch fixes the problem and which one makes it worse.
Ready to Stop Guessing at Your Vent Settings?
Every step above starts with the same piece of gear locked into your kettle. Check today's price on Amazon and see if the Slow 'N Sear is in stock for your grill.
Amazon Check Today's Price on Amazon →