
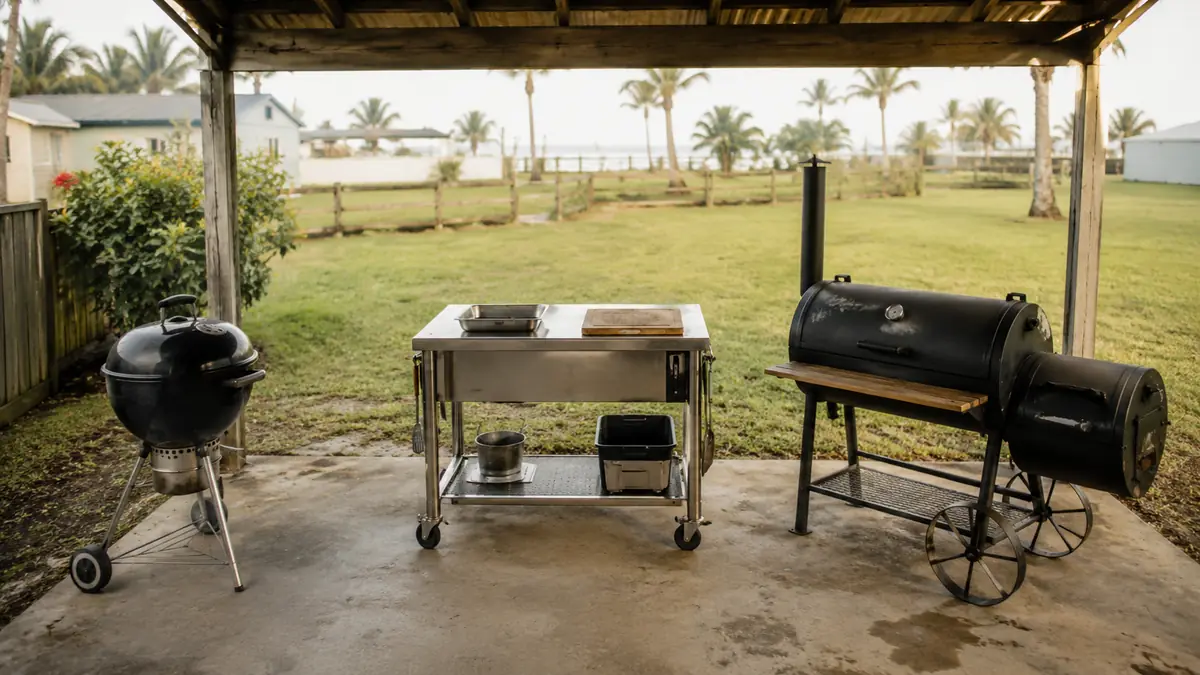
Every Sunday for years I ran the same relay race between my kettle and my kitchen, plate in one hand, tongs in the other, dodging Ruben and Tessa on the patio while raw chicken thighs sat wherever I could set them down for ten seconds at a time. The fix wasn't a bigger grill. It was giving my whole grill station a real layout, and the piece that made it finally work is a rolling prep table cart I've now run between my kettle and my offset for over a year, the Royal Gourmet PC3404S. If your grill station is really just a grill and a hope, this is the setup I wish somebody had walked me through the first summer I started cooking for a crowd.
This isn't a review of the cart itself. I already wrote that one, a full year of use on my patio, if you want the long version of what held up and what didn't in my Royal Gourmet cart review. This is the layout and the workflow, the actual steps for turning a stainless steel rolling prep table into the backbone of your grill station instead of one more surface to pile things on. I'll walk you through where to park it, how to keep raw and cooked separated, what belongs up top versus down on the shelf, the trash bag routine that saved me from kicking over a grocery bag every other Sunday, keeping your tools close, locking the wheels, and the reset I run at the end of every single cook so the next one starts clean.
Tired of Setting Raw Chicken Down Wherever You Can Find a Foot of Counter?
A rolling prep table gives your grill station a real center of gravity. The Royal Gourmet cart is the one I've leaned on for a full year of Sunday cooks. See today's price and current availability on Amazon.
Amazon Check Today's Price on Amazon →Step 1: Give the Cart Real Clearance From the Firebox
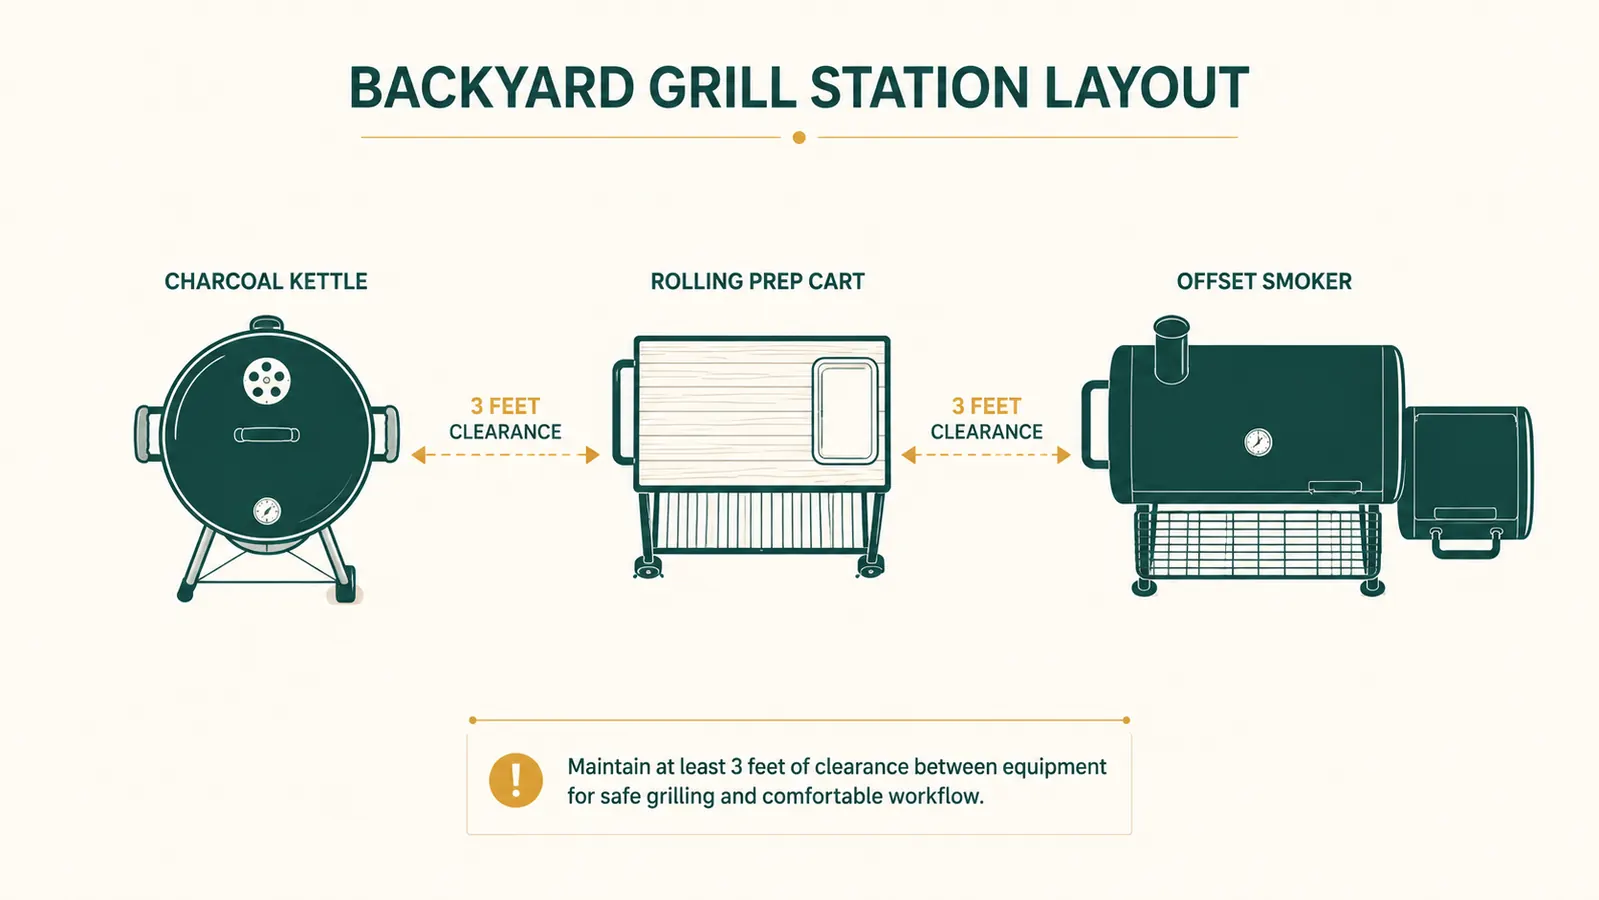
The first place people go wrong, me included, is parking the cart too close to the grill because it feels efficient to have everything shoulder to shoulder. I made that mistake the first week I owned this thing. I pushed the Royal Gourmet cart right up against the kettle, and within a few cooks the powder coat on the corner nearest the firebox had picked up a faint discoloration from sitting in that heat too long. Radiant heat off a firebox travels a lot further sideways than you'd guess, especially with any wind pushing it, and I get plenty of that off the water here in Corpus Christi.
I moved the cart back about three feet from both the kettle and the offset and haven't had the issue since. Three feet is the number I'd tell a neighbor to start with, more if you're running a stick burner that throws real heat off the firebox side the way mine does. Give yourself enough room that you could comfortably walk between the cart and the grill without turning sideways. If the metal frame or the powder coat ever feels warm to the touch during a normal cook, that's your sign to roll it back further.
Wind off the water makes this trickier than it sounds on a calm day inland. A gust can bend a flame or push smoke sideways off the offset in a way that puts real heat somewhere it wasn't a minute ago, so I don't set the cart's final spot until I've watched a full cook or two and paid attention to which direction the heat actually travels on a windy afternoon versus a still one. Once you've found the spot where the cart stays cool no matter which way the wind is blowing, mark it somehow, a chalk line on the concrete or just a mental note, so you're not re-guessing the distance every single week.
Step 2: Split the Top Into a Raw Zone and a Landing Zone
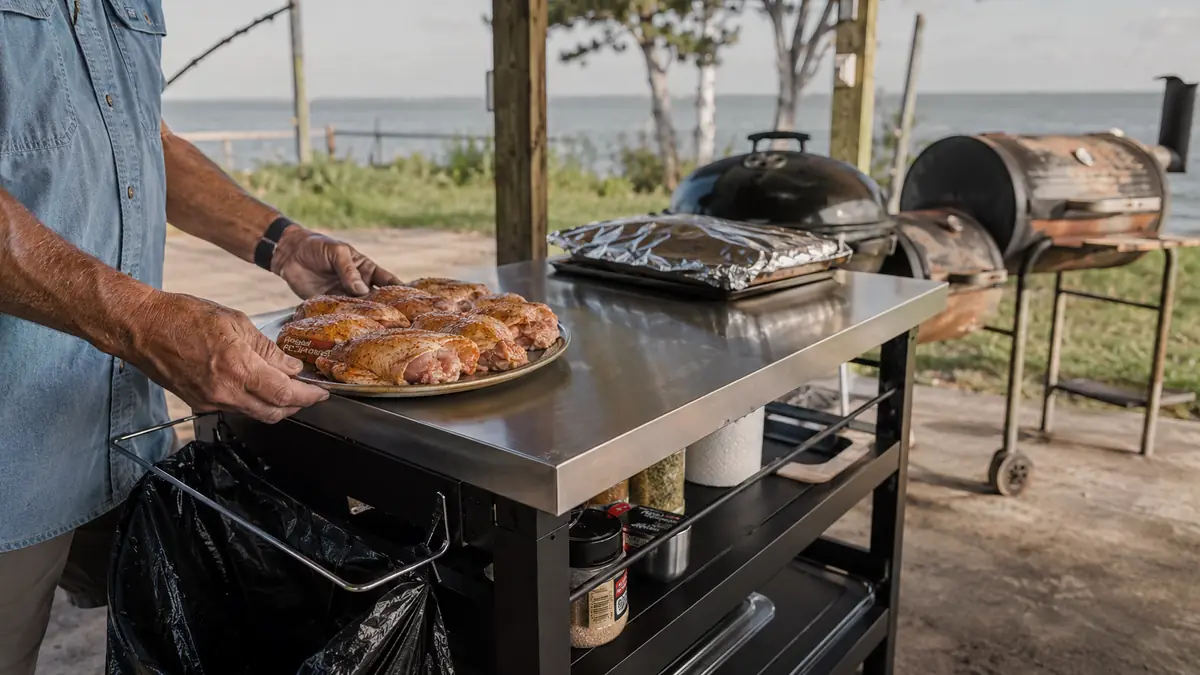
Once the cart is parked at a safe distance, the next decision is how you use the surface itself, and this is the one that actually prevents somebody from getting sick. Raw meat and finished meat cannot share the same patch of stainless steel without a wipe down in between, full stop. I split my 34 by 20 inch top into two working ends. The end closer to the grill is where raw meat sits before it hits the grate, rubbed, trimmed, staged and ready to go. The far end, closer to the kitchen door, is strictly for finished product resting under foil.
I keep a dedicated platter for raw and a separate one for cooked, and I never let the two touch the same section of the Royal Gourmet top without running a rag with a little soap and water over that spot first. If you're cooking multiple proteins in one session the way I do most Sundays, chicken and ribs and sometimes a brisket depending on who's coming over, this raw-to-cooked separation matters even more, because you're crossing that line more often in a single afternoon. Wipe the surface between each transition. It takes ten seconds and it's the single habit that keeps this whole setup safe.
Step 3: Decide What Belongs on Top and What Goes on the Lower Shelf
Not everything needs to live on the stainless top, and trying to fit it all up there just clutters the one surface you need to stay clear for meat. Up top, I keep only what I'm actively using during that stretch of the cook: my instant read thermometer, a rub shaker or two, tongs, a cutting board, and whatever sauce I'm mopping with. That's it. Everything else goes on the wire shelf underneath the Royal Gourmet cart, where it's out of the way but still within reach.
Down on the shelf is where my chimney starter lives, along with a bag of lump and the small tools I don't need every five minutes, a basting brush, spare foil, extra skewers. One thing I learned the hard way living this close to the Gulf, that lower shelf isn't sealed, and loose paper bags of charcoal or dry rub take on humidity fast in this climate. I moved everything on that shelf into sealed containers after my first damp season, and it's made a real difference in how long a bag of charcoal actually stays usable.
On a bigger Sunday, when Hollis and his crew wander over and it's twelve people instead of six, I'll also stage extra plates and a stack of napkins on the shelf ahead of time so I'm not making a trip inside mid cook to grab them. That's really the test of whether your top-versus-shelf split is working, whether you can run a full afternoon of cooking for a crowd without leaving your station more than once or twice.
Step 4: Build a Real Trash Bag Workflow
This is the small habit that ended up mattering more than I expected when I first set this cart up. Before I had a dedicated cart, I'd set a grocery bag on the ground next to the grill and kick it over at least twice a season, usually right when I had my hands full of something else. The Royal Gourmet cart has a built in wire trash bag holder on the side, and I hang a fresh bag on it before I put a single piece of raw meat down.
For a long cook, a Sunday brisket that runs most of the afternoon, I'll tie that bag off and swap in a new one around the halfway mark rather than let trimmings and paper towels pile up past the rim. It keeps the ground around the cart clear, which matters plenty when Ruben is standing right there watching me slice, and it means I'm never carrying a dripping bag of trimmings across the patio looking for somewhere to set it down.
Step 5: Keep Your Tools Within One Arm's Reach and Lock the Casters
Once raw, cooked, storage and trash all have a home, the last piece is arranging the cart so you're not reaching across your own body for anything mid cook. I keep my most-used tools, tongs, a spatula, my thermometer, on whichever side of the cart faces my dominant hand when I'm standing at the grill, so I'm never twisting around or setting something hot down just to grab a tool. It sounds like a small thing until you've done it for a full season and realized how many extra steps it saves you.
The Royal Gourmet cart rolls on four casters and two of them lock, and I lock those two every single time before I set anything heavy down, a full pan, a platter, a cutting board loaded with a brisket. An unlocked cart drifting an inch while you're trying to slice against it is how you end up with a knife going somewhere you didn't plan. Lock the wheels first, then load the top. It's one extra second and it's not optional in my kitchen, or my patio, whichever you want to call it.
When I'm running both grills at once, chicken on the kettle and a rack of ribs on the offset, the cart sits roughly in the middle so I can reach either one without walking more than a couple of steps. That middle position only works because the wheels are locked. If it drifted even a foot toward one grill over the course of an afternoon, I'd lose the reason I bought it in the first place, which was cutting the walking down, not just moving it around.
Step 6: Run the End of Cook Reset
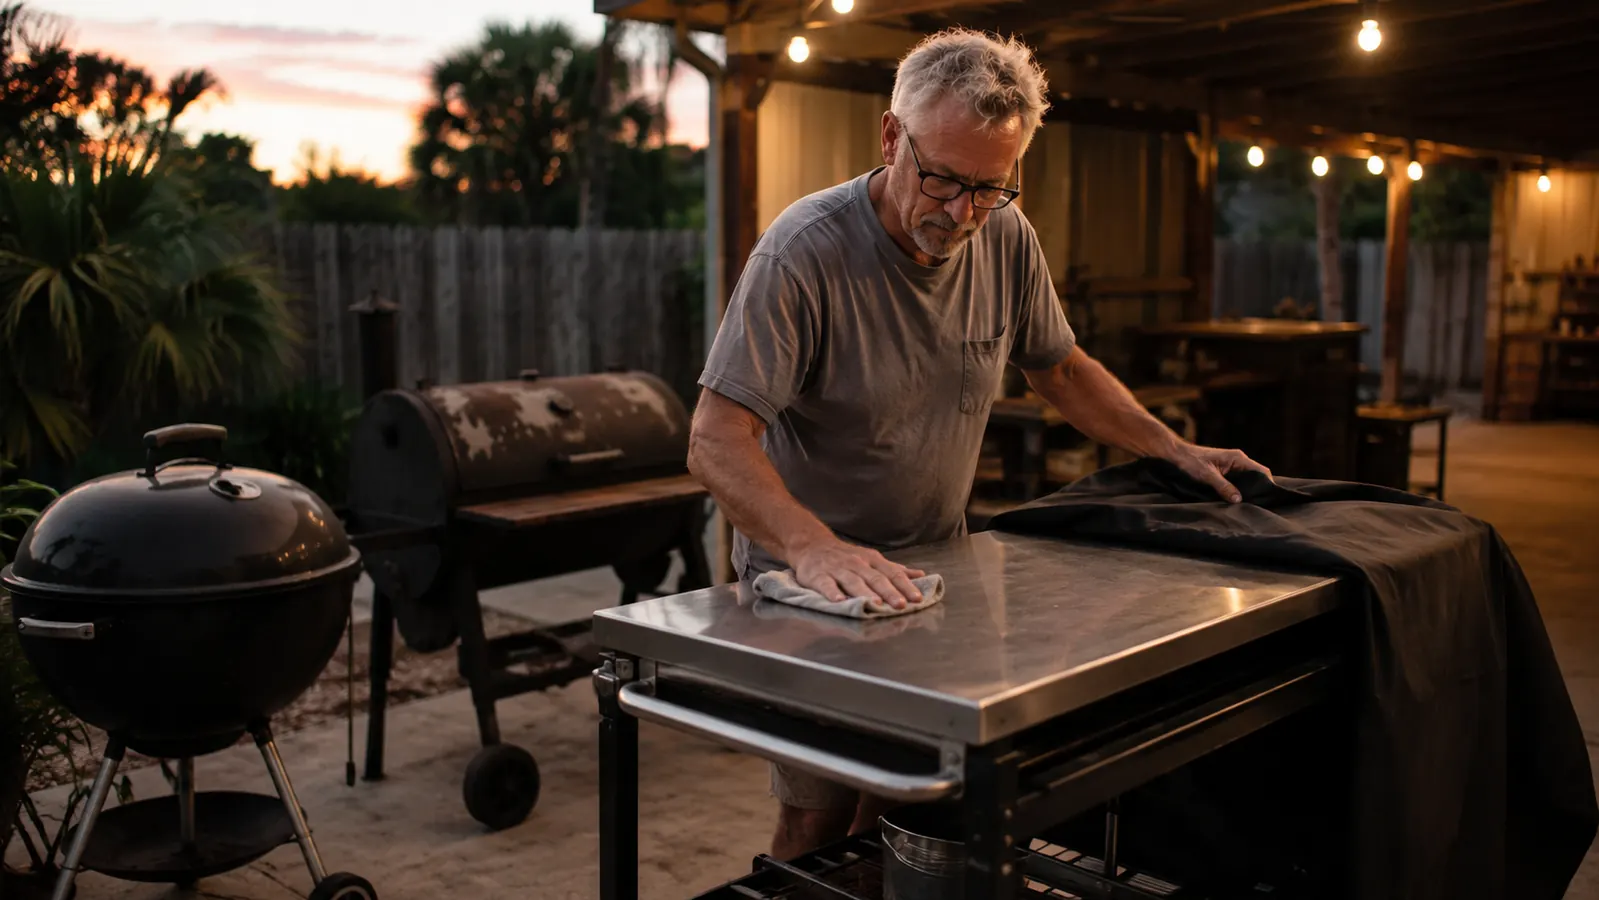
The habit that makes every single one of these steps worth doing again next Sunday is the reset you run once the last plate is served. I wipe the stainless top down with a wet rag and, every month or so, a proper stainless cleaner to keep it looking close to new. I empty and tie off whatever trash bag is hanging on the side. I restock the shelf, sealed containers closed back up, chimney starter emptied of ash and set back in its spot.
The step people skip, and the one that costs the most over time, is covering the cart. Living this close to salt water, anything metal left uncovered overnight starts showing surface rust faster than you'd think, bolt heads and caster axles especially. I pull a fitted cover over the Royal Gourmet cart every time I'm done for the day now, and I give the caster axles a light coat of silicone lubricant every couple of months. Skip that step in a humid, salty climate and you'll be dealing with squeaky wheels and rusted hardware well before the cart has earned it.
What Else Helps
A cart alone won't fix a disorganized grill station if the rest of your setup fights it. I've got a separate piece walking through building your own prep table versus buying one if you're still deciding which way to go, and another rounding up ten reasons a rolling prep table changes a normal weekend cook if you want the fuller case for adding one to your station. And if your offset is part of your setup the way mine is, the ash and grease buildup at the end of a long smoke deserves its own routine too, which I cover in how I clean my offset smoker with an ash vacuum as part of that same end of cook reset.
The cart didn't make me a better cook. It just meant raw chicken stopped sitting on whatever surface I could find.
Ready to Give Your Grill Station a Real Layout?
A rolling prep table is the piece that ties a grill station together, and the Royal Gourmet cart is the one I've trusted for over a year of Sunday cooks. Check today's price on Amazon and see if it's in stock.
Amazon Check Today's Price on Amazon →